@BasicCoder the concept behind RepRap are self replicating manufacturing machine.
forum: http://forums.reprap.org/
Begin cheap and if you feel it's yours build next better generation of the machine with your cheap machine.
Looks like you are from australia here are an DIY printer from eBay AU:
DIY Prusa I3 3D Desktop Printer
207,55 Euro = AU 299$ free postage (working area 200 x 200 x 180 mm)
Of course you can buy a ready to go 1000$ machine but what are if the machine is 98% of time unused and used only space at your home ?
I self will use my DIY reprap printer to build parts for a homemade 3D scanner I'm thinking and dreaming about the last 3 years.
The test cube 4x4cm = 50g isn't solid inside is a structure like our bones and makes it really stable you know ?
Joshy
My reprap 3d printer build
-
D.J.Peters
- Posts: 8586
- Joined: May 28, 2005 3:28
- Contact:
Re: My reprap 3d printer build
Last edited by D.J.Peters on Jan 05, 2017 2:56, edited 3 times in total.
-
D.J.Peters
- Posts: 8586
- Joined: May 28, 2005 3:28
- Contact:
Re: My reprap 3d printer build
Tip: I polished a face from the cube with a few drops of acetone on a cloth I made twisting movements about a minute.
The layers are no longer visible looks like a professional created plastic part with a shiny flat surface.
(In terms of health I self use acetone only outside of any closed room)
Joshy
The layers are no longer visible looks like a professional created plastic part with a shiny flat surface.
(In terms of health I self use acetone only outside of any closed room)
Joshy
-
D.J.Peters
- Posts: 8586
- Joined: May 28, 2005 3:28
- Contact:
Re: My reprap 3d printer build
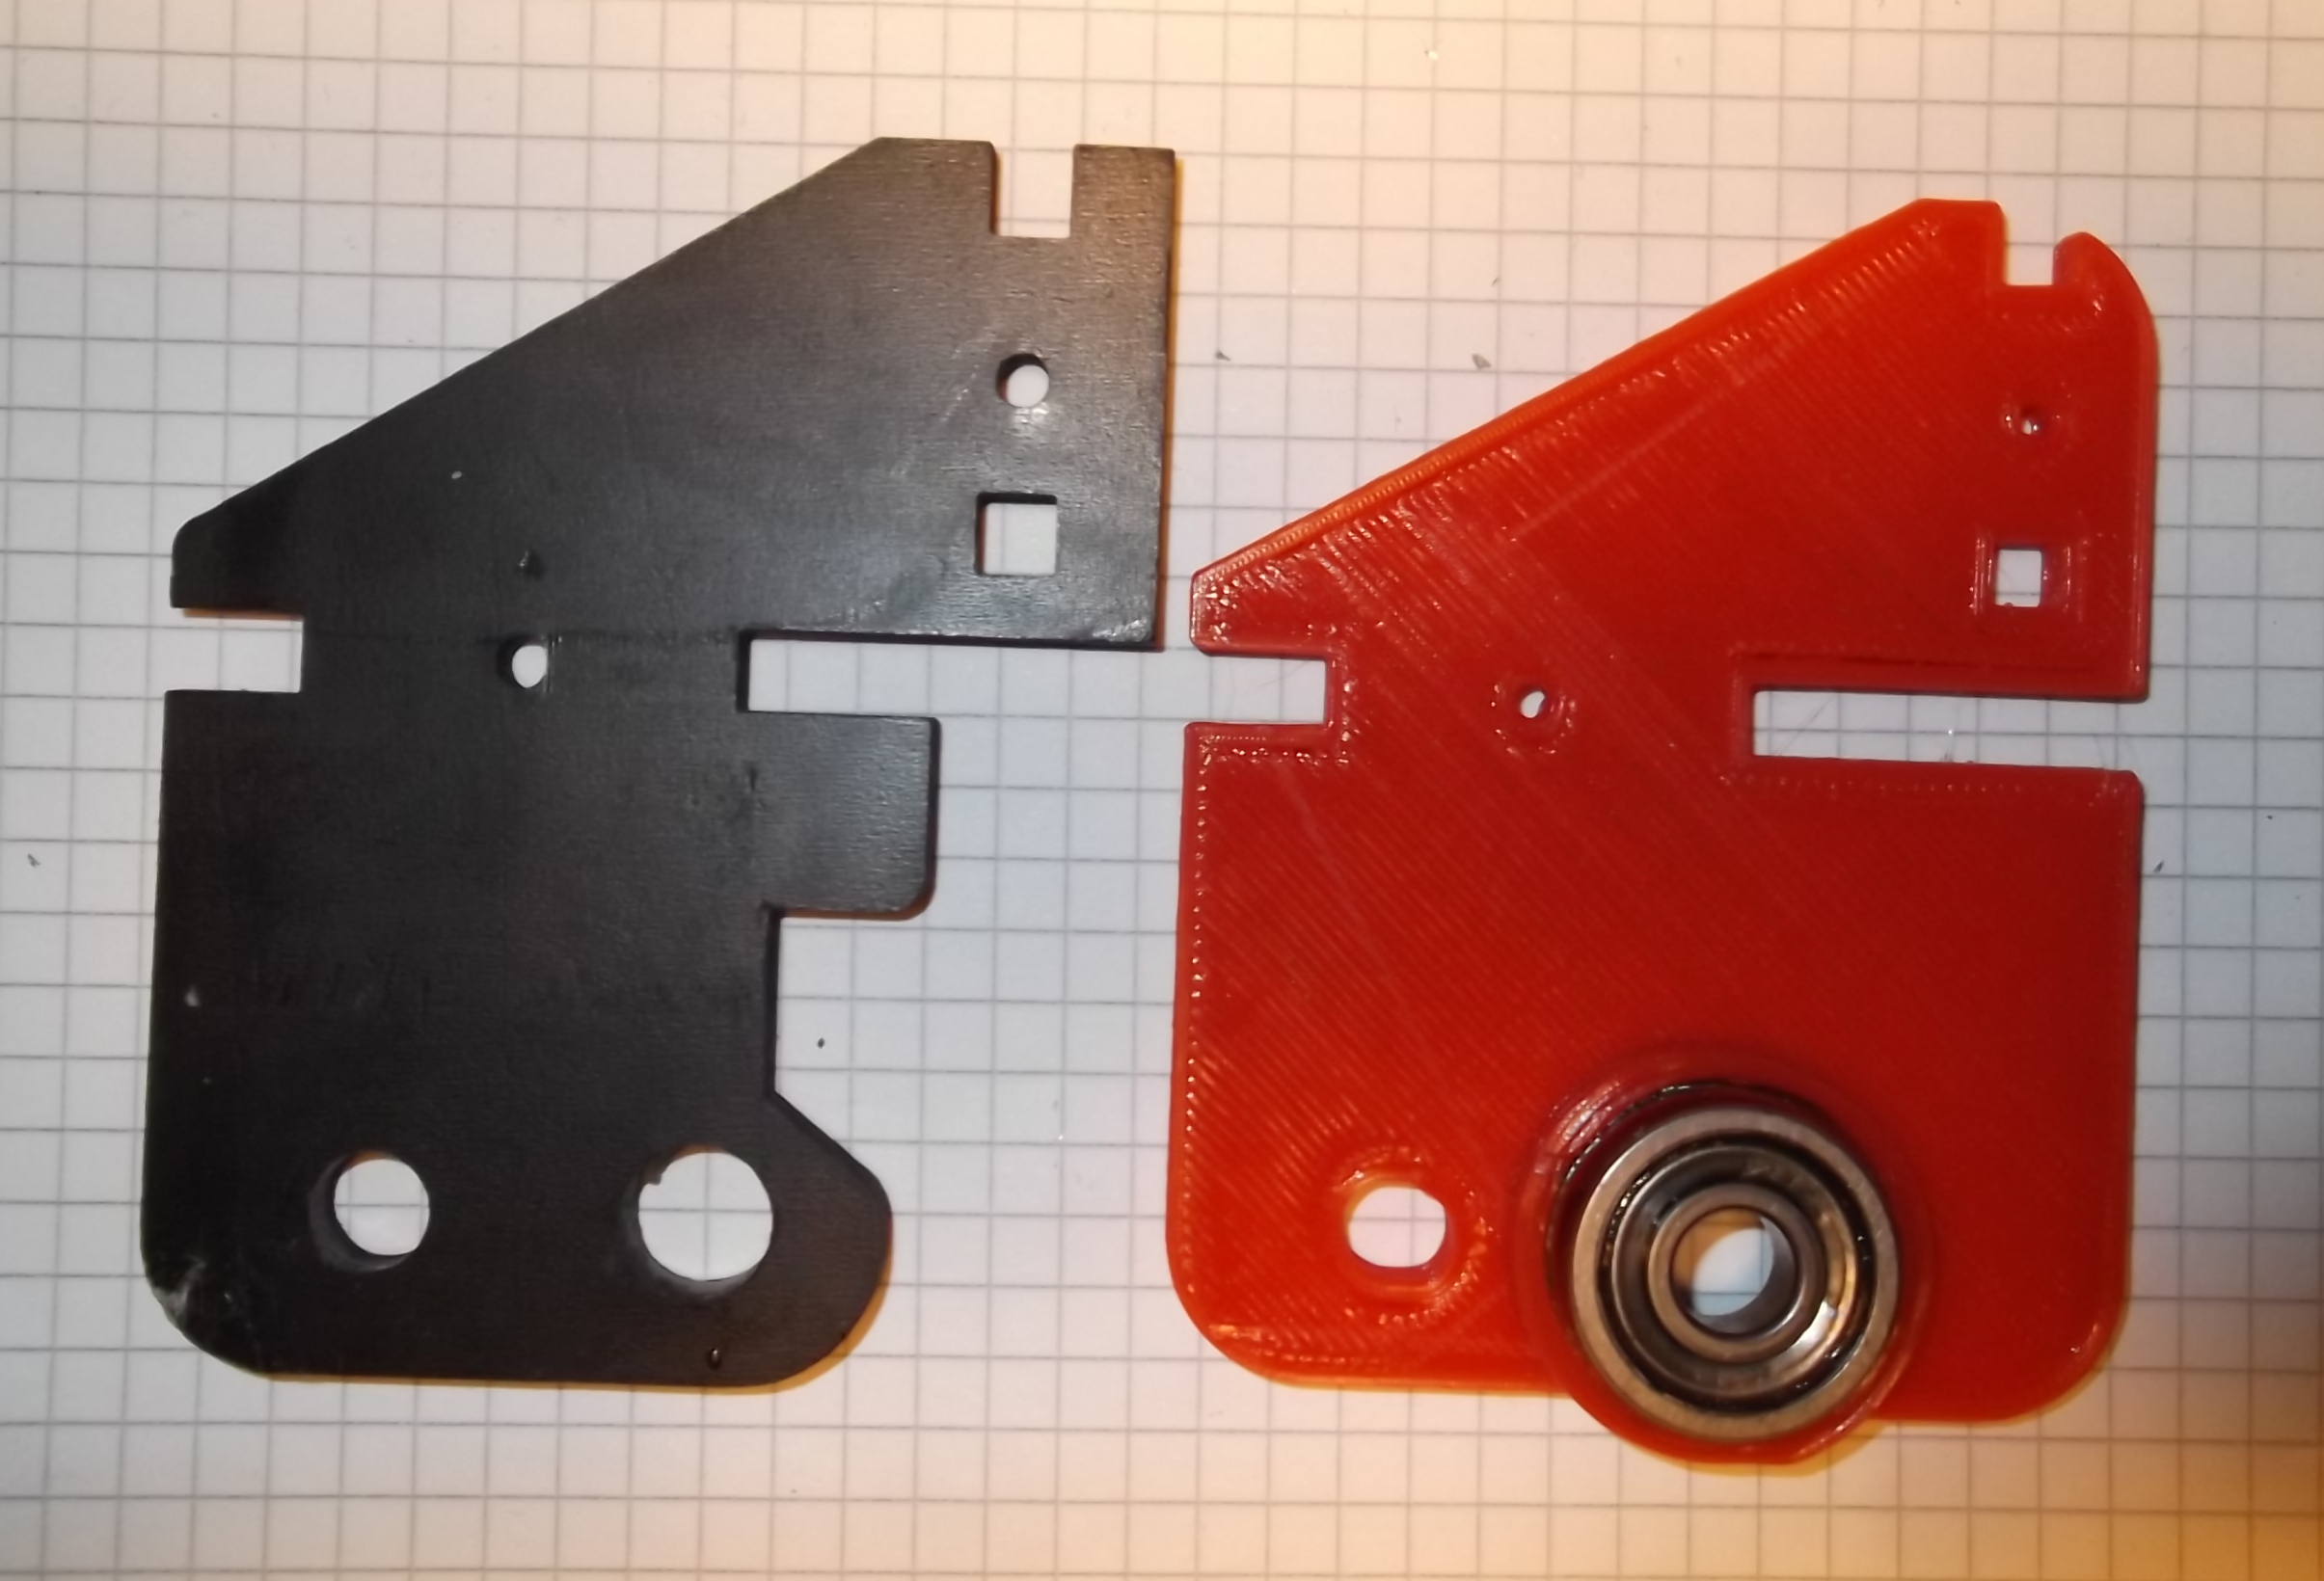
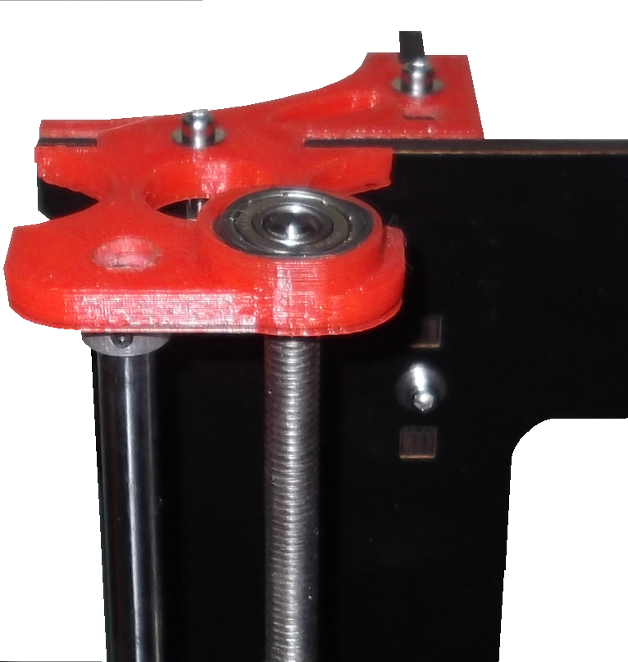
My first reprap improved printed part.
I replaced the left and right cheap plywood z-axis holder with a printed part and added 8x22x7mm ball bearing to reduce the z wobbling.
click to enlarge:

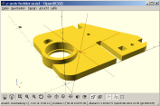
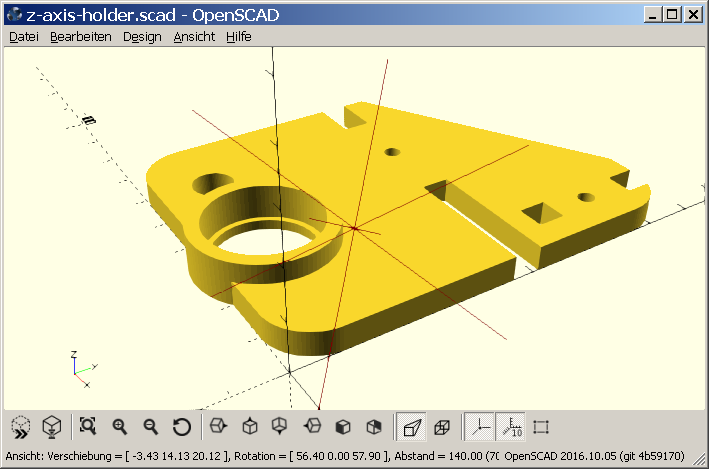
I created the parts with the free OpenSCAD
click to enlarge:
Happy 3D printing ;-)
Joshy
I replaced the left and right cheap plywood z-axis holder with a printed part and added 8x22x7mm ball bearing to reduce the z wobbling.
click to enlarge:
I created the parts with the free OpenSCAD
click to enlarge:
Happy 3D printing ;-)
Joshy
Last edited by D.J.Peters on Sep 25, 2017 21:28, edited 2 times in total.
Re: My reprap 3d printer build
So the left one is the original part and the right one is your print? Looks fine already except the cutouts, but those can probably be simply corrected using a drill.
Which CAD did you use to create the model for the printed part? //edit: your updated post already answers my question :-)
I'm still following your updates with interest. Did you get all the knowledge for building that and being able to select appropriate parts from the web?
Which CAD did you use to create the model for the printed part? //edit: your updated post already answers my question :-)
I'm still following your updates with interest. Did you get all the knowledge for building that and being able to select appropriate parts from the web?
-
D.J.Peters
- Posts: 8586
- Joined: May 28, 2005 3:28
- Contact:
Re: My reprap 3d printer build
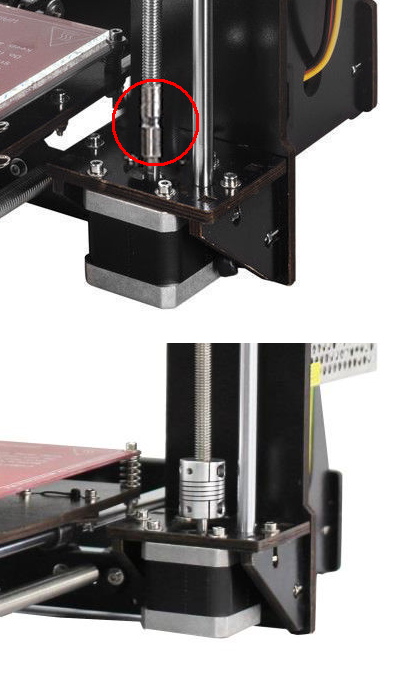
Here are one of the problems of the cheapest Prusa i3 (clone) design:
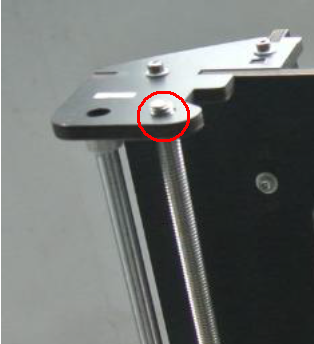
You can see the threaded rod M8 300 mm works like a drill in the thin plywood hole.
The hole diamenter grows the result is a wobbling on the z-axis
one simple solution I replaced the stupid hole with a ball bearing.
There isn't enough space on the original part to glue the ball bearing above the plywood hole.
Another point of z axis wobbling are the cheap coupling and the solution are a real motor shaft coupling.
Joshy
Last edited by D.J.Peters on Sep 25, 2017 21:29, edited 1 time in total.
-
D.J.Peters
- Posts: 8586
- Joined: May 28, 2005 3:28
- Contact:
Re: My reprap 3d printer build
The z-axis wobbling are gone :-)
Back to FreeBASIC I develop a fast slicer algorithm.
It's a really complex piece of code.
Joshy
click to enlarge:

Back to FreeBASIC I develop a fast slicer algorithm.
It's a really complex piece of code.
Joshy
click to enlarge:
Last edited by D.J.Peters on Sep 25, 2017 21:29, edited 1 time in total.
-
D.J.Peters
- Posts: 8586
- Joined: May 28, 2005 3:28
- Contact:
Re: My reprap 3d printer build
no words about the distance :-)
https://www.youtube.com/watch?v=wK2APNwEoSk
https://www.youtube.com/watch?v=wK2APNwEoSk
Re: My reprap 3d printer build
Nice, that doesn't even sag a lot as I would have expected; the bridge becomes quite even.
But that isn't your printer, is it?
But that isn't your printer, is it?
-
grindstone
- Posts: 862
- Joined: May 05, 2015 5:35
- Location: Germany
Re: My reprap 3d printer build
Great project! What about using UV - hardening plastic instead of thermoplastic? So you could produce your own dentures ;-)